Why?
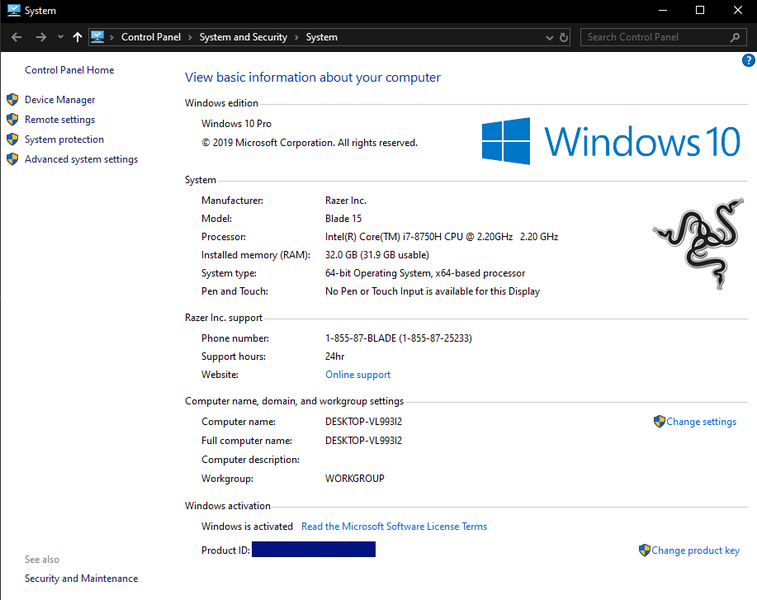
I decided to upgrade my laptop memory this year. While my coding work rarely pushes memory usage above 75%, I recently started doing a lot of Lightroom editing and occasionally video editing as well. I noticed that I was frequently using 15 of 16 GB of memory and I decided to bump it up to 32 gigs. I also heard that the next generation of SSD is coming out soon and will not be compatible with the interface this laptop is using so I decided to ugprade, the storage on the laptop was well to 1TB.
What parts did I get?
This is a high-performance laptop which has served me well for both work and play, I did not want to downgrade any of that so I went for the same speed RAM that was already in this laptop, 2666 MHz.
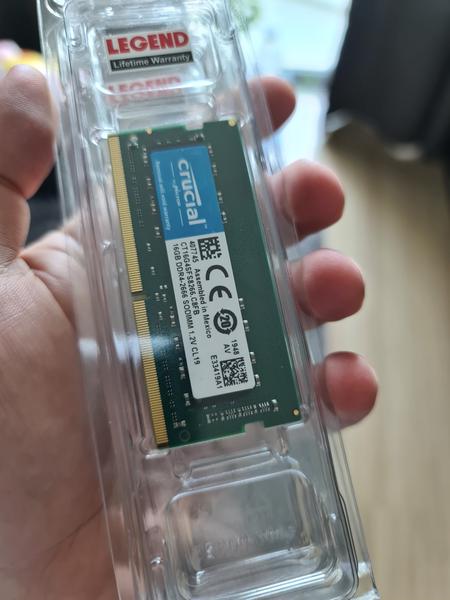
I got two of these babies
For the SSD I opted for the Samsung 970 EVO Plus, it’s one of the fastest drives on the market with plenty of excellent reviews.
Installation of RAM and SSD
-
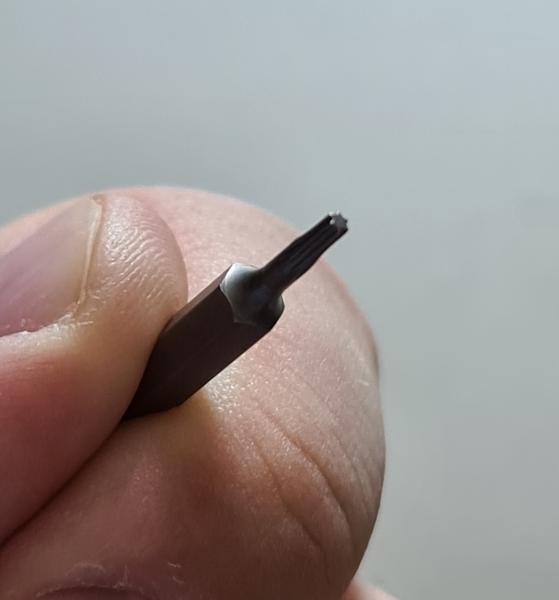
Upgrading this laptop is quite straightforward, if you have the right tools. In particular you need this kind of screw driver bit (I think it’s called Torx, but there are several sizes). Be sure to touch a stove or heater or something metal to rid yourself of static electricity.
-
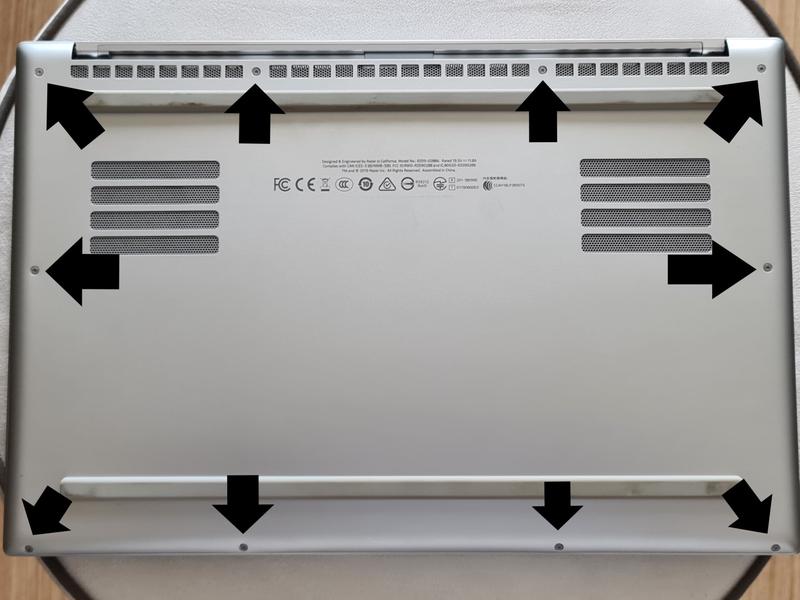
First remove the screws. Loosen them bit by bit, avoid taking them out in one go to prevent putting uneven pressure on the screws.
-
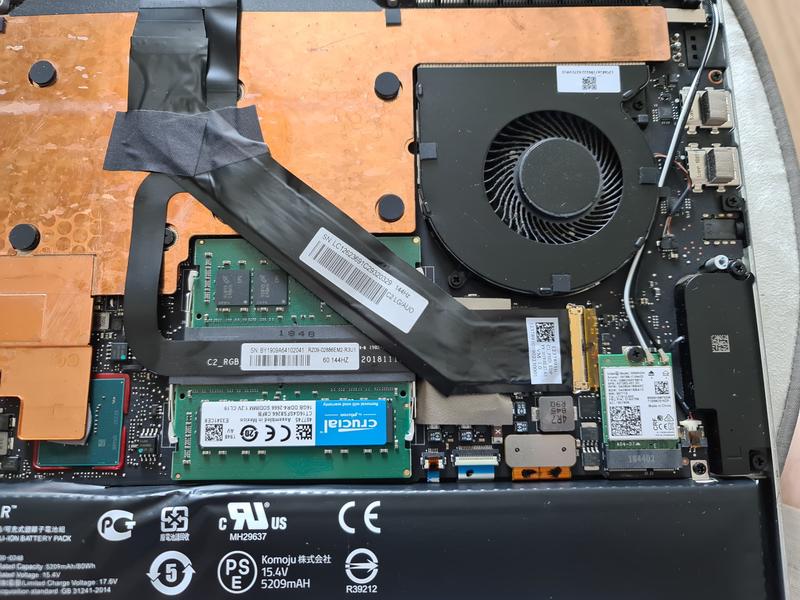
There are three things that are easily upgradable in this laptop: RAM, SSD Storage (M2 interface), and Wifi adapter.

-
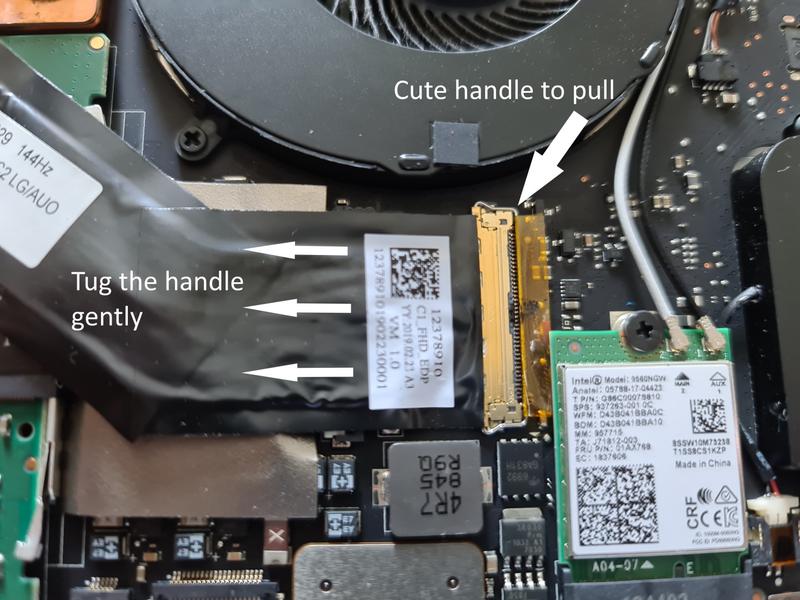
In this particular year of Razer laptops (this doesnt seem to be the case in late 2019 models), there is a ribbon cable that runs across one of the RAM slots which makes it slightly tricky. Thankfully, the ribbon cable is easily removable by pulling back on the tiny lever shown below.
-
Once the ribbon is out of the way, you can pop the Ram by pulling outward the metal clips on both sides of the RAM. Putting in the new RAM is a combination of insertion and pulling down the RAM until it clicks into the metal clips. The final result is more RAM!
-
Before upgrading the SSD make sure you have a way to reinstall Windows since all your data will be gone. I did this by creating a bootable recovery USB drive (you will need at least a 16 gig thumb-drive for this). This is quite simple to do, just search the start menu for recovery drive and follow the instructions in the utility (this process will take about an hour, so be sure to go grab a coffee…or a beer)
-
I upgraded the SSD the next day after it came in the mail so I forgot to take the photo, sorry! But, it is the easiest to upgrade. Simply remove the single screw holding it down and tug it gently until it comes out. Slide the new one in and put the screw back into place.
-
After screwing the cover back on, boot the machine with the USB drive inserted. Razer laptop will automatically detect the boot drive and begin the installation process.
The result!
Ram looking good!
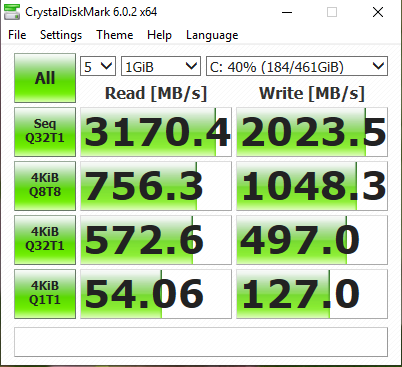
Comparing the speeds of the old SSD vs new one.
Old storage
New storage
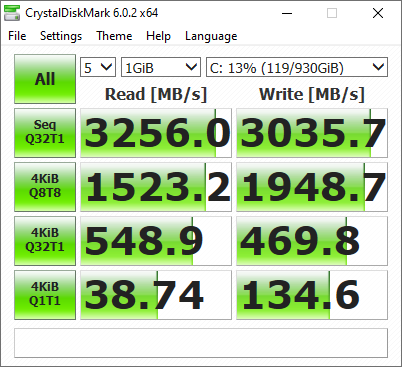
The result looks excellent, the reads are overall faster and the writes are much much faster. The speed boost was noticable especially when copying or decompressing files or installing new software.